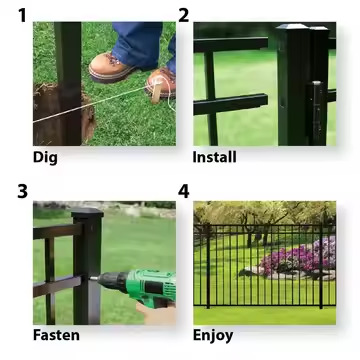
Site Assessment and Planning for Fence Panel Installation
Effective fence panel installation begins with thorough site evaluation. Teams that invest 15–20% of project time in planning reduce alignment errors by 34% and improve compliance outcomes (Construction Safety Journal 2023).
Conducting a Comprehensive Site Assessment to Determine Fence Layout and Access Points
Surveyors should map perimeter boundaries using GPS coordinates or property markers. Contact local 811 services to identify underground utilities and prevent damage to gas lines or electrical cables. Document natural slopes exceeding 15°, which may require stepped fencing solutions for stability and safety.
Using Control Posts and String Lines for Accurate Fence Alignment
Install temporary control posts every 50 meters along the proposed fence line. Stretch brightly colored string between them to create visual guides, maintaining ±3mm deviation across spans. This method reduces post-installation adjustments by 41% compared to laser-only setups, offering a reliable, low-tech alignment solution.
Strategic Placement of Gates and Access Points in Construction Fencing Layouts
Position primary gates within 10 meters of material staging areas and equipment access roads. For sites over 5 acres, include secondary emergency exits every 200 meters, ensuring a clear 4-meter width for emergency vehicle passage. Proper gate placement enhances operational efficiency and meets safety code requirements.
Integrating Safety and Compliance Requirements into Initial Planning
Apply OSHA 1926.502 standards when fencing elevated work zones to ensure fall protection. Maintain 12–18 inches of clearance between fence panels and excavation edges on trench-heavy projects. Where fencing borders public sidewalks, incorporate ADA-compliant warning systems such as tactile paving strips to support accessibility.
This structured approach ensures fence installations meet both operational needs and regulatory mandates while minimizing rework. Teams using these planning methods report 27% faster installation timelines compared to ad-hoc approaches.
Choosing the Right Fence Panels for Construction Site Needs
Comparing Chain-Link and Anti-Climb Welded Wire Panels for Security and Durability
Chain-link panels offer cost-effective perimeter security with 60–70% visibility, deterring casual trespassers. However, anti-climb welded wire panels—featuring 2" x 3" mesh spacing and rolled tops—reduce intrusion attempts by 83% compared to standard chain-link (Perimeter Security Institute 2023), making them ideal for securing high-value equipment and restricted zones.
Evaluating Temporary Fencing Options and Panel Systems for Short-Term Projects
Modular panel systems allow rapid deployment on short-term projects, with crews installing 150–200 linear feet per hour. Coastal environments demand hot-dip galvanized panels to resist salt corrosion, while urban sites benefit from noise-reduction fencing that lowers ambient sound by 8–12 decibels.
Matching Fence Panel Types to Project Duration, Location, and Risk Level
| Factor | Low-Risk Scenario | High-Risk Scenario |
|---|---|---|
| Project Duration | Interlocking plastic panels (1–4 weeks) | Welded steel panels (3+ months) |
| Environmental Exposure | Powder-coated panels | Galvanized steel panels |
| Site Population Density | Standard 6' height | 8' anti-climb with cantilever tops |
Applications of Fence Panels in Construction Sites Versus Event Management
Construction fencing prioritizes durability: 14-gauge steel panels withstand winds up to 120 mph. In contrast, event barriers often use 85% recycled HDPE plastic with decorative inserts, emphasizing aesthetics and portability over structural resilience.
Accelerating Installation with Prefabricated Fence Panels and Modular Systems
Leveraging Modular Fencing and Preassembled Panels to Accelerate Deployment
Putting up prefabricated fence panels can save around 60% of the time needed for installation compared to old school methods. The standardized connectors work kind of like building blocks really, letting folks assemble them piece by piece. Components are interchangeable so adjusting heights becomes a breeze instead of a hassle. No need to mess around with hardware on site since brackets come pre attached already. Plus those fancy privacy screens or anti climb features mean less time spent retrofitting later on. According to field reports from site managers, getting everything set up takes roughly 40% less time with these newer systems in place.
Benefits of Prefabricated Fencing Components in Reducing On-Site Labor Time
Factory-assembled panels minimize cutting and welding, lowering labor costs by 20–35% (Construction Efficiency Index 2024). Pre-drilled holes and pre-mounted hinges ensure precision, allowing crews to install 150–200 linear feet per hour—three times faster than conventional techniques. This efficiency is essential for fast-tracked or short-duration projects.
Installing Rails Using Cleats and Guide Blocks for Speed and Accuracy
Guide blocks attached to footings enable single-worker rail installation with millimeter-level accuracy. Pneumatic cleat drivers secure rails in 20-second intervals—versus 3–5 minutes for manual bolting—reducing alignment errors by 85% and eliminating the need for laser levels or surveying tools.
Efficient Cutting and Preparation of Fence Slats Using Jigs and Saw Stations
Portable saw stations with adjustable jigs standardize slat lengths, cutting prep time per panel by 35 minutes and reducing material waste by 22%. Consistent miters and notches are critical for large-scale jobs involving 500+ panels. Numbered pre-cut kits further streamline assembly by guiding sequence-specific installation.
Ensuring Precision and Alignment During Fence Panel Deployment
Using Jigs for Consistent Post and Panel Spacing During Installation
Specialized jigs maintain uniform gaps between posts and panels, reducing measurement errors by up to 92% compared to manual methods (Construction Safety Journal 2023). These templates guide drill placement and ensure exact spacing—especially important for anti-climb fencing requiring tight mesh tolerances.
Installing Fence Posts and Panels in Sections to Maintain Alignment and Efficiency
Deploy fencing in 20–30 ft segments to verify alignment before advancing. This segmented strategy prevents cumulative errors, particularly on uneven or sloped terrain, and supports real-time quality checks.
Setting Posts ‘Wild’ (Extra Tall) and Trimming After Installation for Uniform Height
Install posts 6–8 inches taller than needed to accommodate ground variations. Once panels are secured, use rotary lasers to mark a level trim line across the entire run, then cut posts flush for a uniform top edge.
Permanent Concrete Setting vs. Removable Heavy Block Bases: Pros and Practical Use Cases
| Method | Installation Time | Removal Cost | Ideal Application |
|---|---|---|---|
| Concrete Footings | 48–72 hours | High | Permanent site perimeters |
| Steel-Braced Blocks | 2–4 hours | Low | Temporary access roads |
Concrete footings provide maximum stability for high-security fencing near roadways, while weighted block bases offer flexibility for dynamic construction layouts.
Optimizing Workflow and Resource Management for Large-Scale Fence Panel Projects
Sequencing concrete setting with panel installation to avoid workflow bottlenecks
Coordinate concrete curing schedules with panel deployment to maintain momentum. Install fencing in non-concrete zones while adjacent footings cure, avoiding idle periods during the 24–72-hour hardening window. This phased method improves productivity, with managers reporting up to 40% faster completion in large-scale builds (Construction Efficiency Report 2023).
Staging materials and crews for uninterrupted fence panel assembly
Place fence panels, posts, and hardware within 15 meters of installation zones to reduce worker travel time by 60%. Organize dedicated teams for ground prep, post-setting, and panel hanging to eliminate tool-sharing delays and sustain continuous workflow.
Time-saving strategies and resource management in large-scale installations
Parallel workflows accelerate progress:
- Survey teams mark layouts as materials arrive
- Drill operators prepare holes while panels undergo quality checks
- Night crews install safety lighting while day teams secure base components
This tiered execution reduces overall duration by 30% without compromising safety or quality.
Balancing cost, speed, and compliance in high-pressure construction environments
Contractors use weighted scoring models to prioritize key factors:
| Factor | Weight | Speed Optimization | Cost Control | Compliance Assurance |
|---|---|---|---|---|
| Labor Hours | 35% | Prefab components | Cross-training | OSHA protocols |
| Material Waste | 25% | Laser-guided cuts | Bulk ordering | Recycling mandates |
| Equipment Use | 20% | GPS grading | Rental pools | Noise ordinances |
| Permitting | 20% | Digital approvals | Fee tracking | Zoning laws |
This data-driven framework supports balanced decision-making, helping teams stay within 5% of project benchmarks.
FAQ
What is the first step in planning for fence panel installation?
The first step involves conducting a comprehensive site assessment to determine the fence layout and access points.
How do prefabricated fence panels accelerate installation?
Prefabricated fence panels save installation time by using standardized connectors and pre-attached hardware, minimizing on-site labor.
What considerations should be made for choosing fence panels based on project duration and risk?
For short projects, interlocking plastic panels may suffice, while longer projects may require welded steel panels. High-risk sites benefit from anti-climb fencing with enhanced security features.
Table of Contents
-
Site Assessment and Planning for Fence Panel Installation
- Conducting a Comprehensive Site Assessment to Determine Fence Layout and Access Points
- Using Control Posts and String Lines for Accurate Fence Alignment
- Strategic Placement of Gates and Access Points in Construction Fencing Layouts
- Integrating Safety and Compliance Requirements into Initial Planning
-
Choosing the Right Fence Panels for Construction Site Needs
- Comparing Chain-Link and Anti-Climb Welded Wire Panels for Security and Durability
- Evaluating Temporary Fencing Options and Panel Systems for Short-Term Projects
- Matching Fence Panel Types to Project Duration, Location, and Risk Level
- Applications of Fence Panels in Construction Sites Versus Event Management
- Accelerating Installation with Prefabricated Fence Panels and Modular Systems
- Leveraging Modular Fencing and Preassembled Panels to Accelerate Deployment
- Benefits of Prefabricated Fencing Components in Reducing On-Site Labor Time
- Installing Rails Using Cleats and Guide Blocks for Speed and Accuracy
- Efficient Cutting and Preparation of Fence Slats Using Jigs and Saw Stations
-
Ensuring Precision and Alignment During Fence Panel Deployment
- Using Jigs for Consistent Post and Panel Spacing During Installation
- Installing Fence Posts and Panels in Sections to Maintain Alignment and Efficiency
- Setting Posts ‘Wild’ (Extra Tall) and Trimming After Installation for Uniform Height
- Permanent Concrete Setting vs. Removable Heavy Block Bases: Pros and Practical Use Cases
-
Optimizing Workflow and Resource Management for Large-Scale Fence Panel Projects
- Sequencing concrete setting with panel installation to avoid workflow bottlenecks
- Staging materials and crews for uninterrupted fence panel assembly
- Time-saving strategies and resource management in large-scale installations
- Balancing cost, speed, and compliance in high-pressure construction environments
- FAQ